Braise dat Meat
Braising meats is one of those basic tricks you start to depend on once you have kids—an approach that allows you to apply a burst of energy to cooking in the late afternoon and then to turn your attention back to maintenance of order in the kingdom before things get too out of hand. The other marvelous thing about the braise is that it is a remarkably forgiving technique. Just about any cut of meat can be braised in just about any liquid you have on hand, along with whatever other appropriate ingredients are lying around, and the results will likely be pretty good.
The meal in question for this entry was dinner for us and our friends D. and L., who are about to ship out to Asia for six weeks. We were hoping to see S. as well, since she was heading for LA for a comparable amount of time. I picked up a stack of boneless short ribs at Whole Foods—a nice, fairly inexpensive cut for this sort of thing. But I apply the same basic approach for lamb shanks, osso buco, pork shoulder, ox tails, etc.
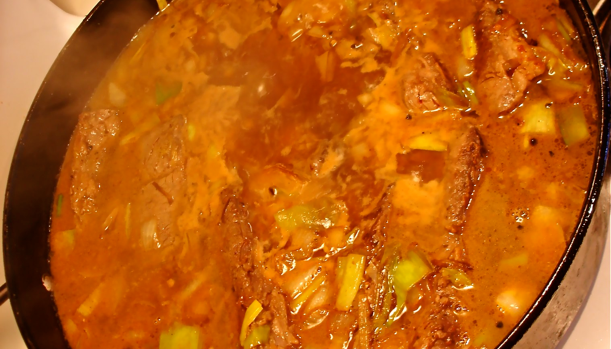
Salt and pepper the meat—a half-hour in advance of cooking time, if you have the time to wait—and then brown it in olive oil. Then set the meat aside for a few minutes and saute a pile of aromatics of some sort. For this dinner I used a big yellow onion and a few leeks. Carrots and tomatoes are a common choice as well. When I do lamb (shanks, for instance), I like to chop up a couple of bulbs of fennel. The strong flavor of the lamb can hold up to the sharp licorice taste.


Once the aromatics are softened up, throw the meat and its juices back into the pan, add liquids to cover and bring to a simmer. I relied here on my own chicken stock—but have been known to supplement with wine or beer, if it’s already open, or with fruit juices, for an extra punch of sweetness. For this one, I also fortified things with a shot of soy sauce and a couple of teaspoons of Adjika. That last is a hot pepper paste—use whatever you have in the fridge and the result will be fine: tabasco, sambal oelek, sriracha, what-have-you. Careful not to over salt at this stage—more on that below.
Once it is simmering away, you can throw it into a 300° oven, if you like, or you can leave it on the stovetop. I’m not sure what the difference is—if your cookware is up to par, then the stovetop will provide much the same effect of fully surrounding the meat with heat as it bubbles away.
Now you are free for a couple of hours, at least. If you have kids, go see what they have lit on fire or begun to dismantle. If you don’t, go read a novel.
When the meat is falling-apart-tender, it is done. Fish it out of the braising liquid—carefully, so that it doesn’t completely disintegrate. It’s always nice to be able to serve people coherent chunks of meat that they can fork apart on their own.
Then all that’s left to do is to produce a sauce out of the braising liquid. First strain out the mushy mess of vegetable bits. Then set it back on the stove, bring to a boil and reduce it to a sauce. Here’s where you will be glad you didn’t over salt for the braising process, since the reduction of liquid will concentrate the salt. Depending on the meat you used, you may have to skim some scum away as you reduce, so keep an eye on things. Also, don’t reduce too much—remember that the sauce will tend to thicken up as it cools, especially if you used a cut with bones in it.
To serve, either plate individual portions, as I did here, or arrange everything on a platter, dribble some juice on top, throw on some fresh herbs perhaps, and put the rest of the sauce in a serving vessel of some sort. Everyone will be pleased.